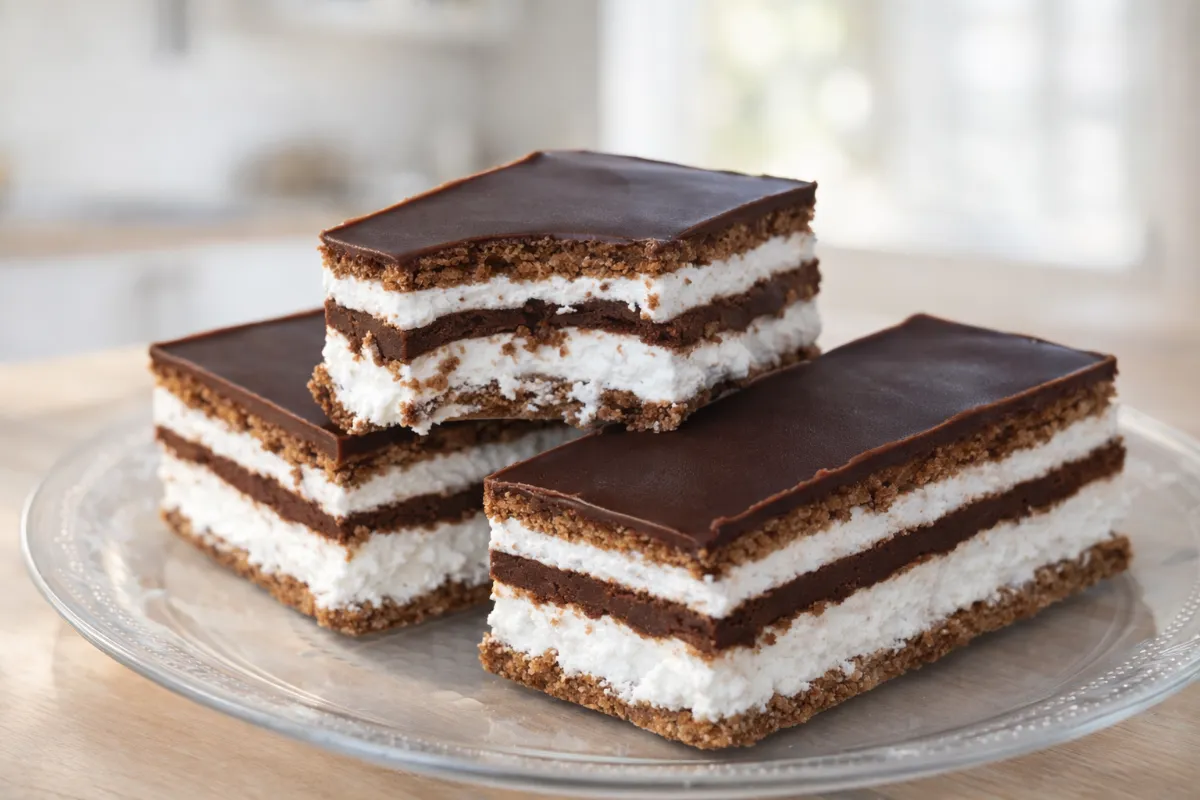
This homemade milk slice with a cocoa sponge and fluffy whipped cream tastes better than store-bought. This method keeps the cream stable and the chocolate layer crisp in every bite.
At a Glance
- Prep time: 45 min | Baking/cooking time: 20 min | Total: 65 min (plus chilling time)
- Servings: 15 pieces | Difficulty: Medium
- Great for: family celebrations, weekend treats, kids
- Make ahead: yes, ideally 12 hours ahead
- Storage: fridge, 3–4 days
- Serving tip: slice with a hot, wet knife
Ingredients
(US measures, with metric in brackets)
For the cocoa sponge
- 3 large egg whites
- 1 pinch salt
- 3 tablespoons granulated sugar
- 3 large egg yolks
- 3 tablespoons warm water
- 3 tablespoons all-purpose flour, sifted
- 1 1/2 teaspoons baking powder
- 1 tablespoon good-quality unsweetened cocoa powder
For the cream filling
- 3 envelopes (about 20 g) unflavored powdered gelatin, 1 envelope = 7 g
- 4 tablespoons (60 ml) cold water
- 2 cups plus 2 tablespoons (500 ml) heavy cream, at least 33% fat
For the inner chocolate layer
- 3.5 oz (100 g) dark chocolate
- 5 tablespoons (70 g) vegetable shortening or butter
- 1 tablespoon neutral oil
- 3 1/2 tablespoons (50 ml) water
For the chocolate topping
- 3.5 oz (100 g) semisweet baking chocolate
- 3 1/2 tablespoons (50 g) vegetable shortening or butter
- 1 tablespoon neutral oil
Instructions
- Heat the oven to 350°F (180°C) and line a 12×16-inch (30×40 cm) baking sheet with parchment paper.
- Beat the egg whites with the salt until stiff, then gradually add the sugar until you have a firm, glossy meringue.
- In a second bowl, beat the egg yolks with the warm water into a pale foam.
- Gently fold the dry ingredients and the prepared meringue into the yolk mixture, alternating between them.
- Spread the batter on the baking sheet and bake for 10 minutes, until springy to the touch.
- Let the baked sponge cool completely, then cut it in half into two equal pieces.
- Let the gelatin bloom in the cold water for 10 minutes, then gently warm it until liquid (do not boil).
- Whip the well-chilled cream until stiff, then gradually beat in the lukewarm gelatin, which makes the dessert firm.
- Melt the ingredients for the inner layer in a water bath and let them cool slightly.
- Spread half of the cream on the first sponge layer and refrigerate for 30 minutes.
- Pour the inner chocolate layer over the cream and chill for 1 hour until completely set.
- Spread on the second half of the cream, cover with the second sponge layer and press down gently.
- Pour the topping, melted over steam, over the whole slice and let it set for at least 4 hours.
Video Recipe
Tips and Storage
- Never boil gelatin. Once it reaches a boil, it loses its gelling power.
- Let the inner chocolate layer set really firm, otherwise it will mix with the whipped cream when you spread the second layer.
- Store the slice in an airtight container in the fridge so the cream does not pick up odors from other foods.
Frequently Asked Questions (FAQ)
Why did my sponge dry out while baking?
It was probably in the oven too long. A thin cocoa sponge needs a short time at a steady temperature, so start checking it after 8 minutes.
Can I replace the gelatin with whipped cream stabilizer?
We do not recommend it for this type of slice. Gelatin gives the specific texture reminiscent of the original milk filling and supports the weight of the top sponge layer.
How do I keep the topping from cracking when I slice it?
The vegetable oil and fat added to the chocolate keep it elastic. Before slicing, use a knife dipped in hot water.
The recipe is based on a version by Natašine Slastice, adapted by the We Cook With Love team.
RATE THIS RECIPE